Scientific Illustration of Insects (according to Joe MacGown) |
|
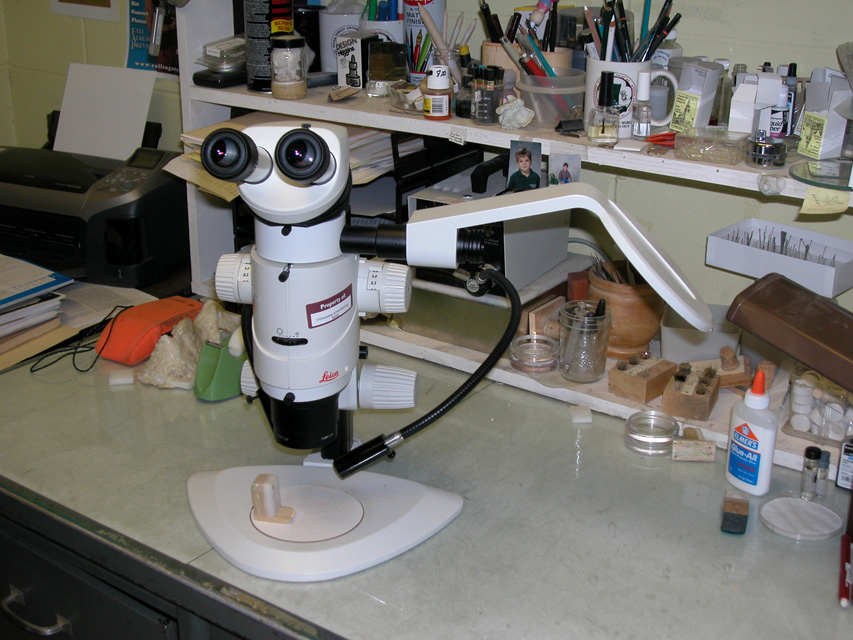
Even in this modern age of photography and numerous technological advances, scientific drawings are still useful and many times better illustrate scientific concepts than photographs. I find it useful to employ a combination of both photography and illustrations to best achieve a given result. There is a wide variety of effective illustrative methods, such as pen and ink, water color, acrylic paint, pencil, carbon dust, colored pencil, mixed media, and even computer graphics, and they all have merit. However, I generally use pen and ink on white scatchboard for my drawings. I also occasionally do watercolor paintings or mixed media with a combination of watercolor, colored pencil, ink, and sometimes professional markers. The advantages of pen and ink is that is very durable, easily reproducible, and relatively inexpensive. My finished drawings are done with rapidograph pens (using a permanent waterproof ink also made by rapidograph) with various pen tip sizes on Essdee scraper board, a type of scratchboard (I order both my pens and scraper board from Dick Blick Art Supplies). Many people are familiar with pre-inked black scratchboard, but I use un-inked white scratchboard. This is a versatile drawing surface that is coated with clay. Ink can be applied in much the same way as on other drawing surfaces, but the ink can also be scratched away, hence the name scratchboard. This is ideal for showing light hairs against a dark background or other similar features. All drawings start the same way, by first carefully studying the specimen, which in my case, is generally an insect on a pin. I have also done some botanical illustrations, but careful study still applies. If any taxonomic information is available, it is quite useful to read that as well, because if you know the most important characteristics of the species being drawn, you can emphasize them. There are several different ways to draw insects and they all involve the use of a microscope. The drawing method depends on the size of the insect and whether or not it is a structure of an insect or an entire insect. For generalized drawings of the whole body (called habitus drawings) I usually use a drawing tube, that is mounted on my stereomicroscope, a very nice Leica MZ16 (see picture below).
|
|
 |
|
Drawing tube attached to a Leica MZ16 stereomicroscope |
|
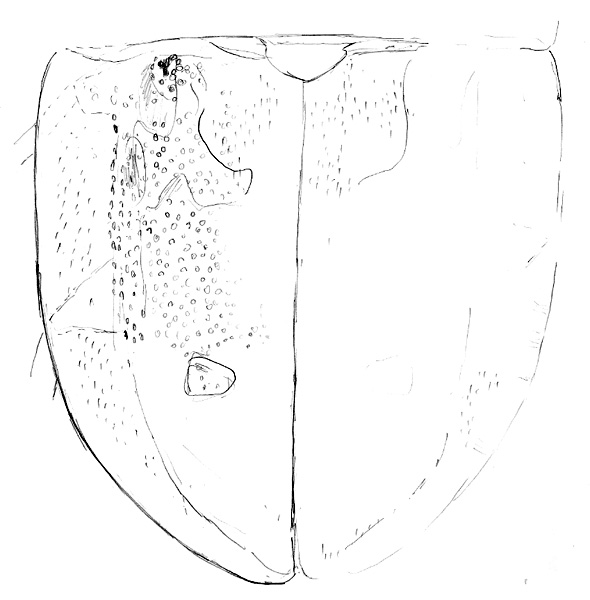
| Drawing tubes are made specifically for a given brand of microscope and will not work on another scope. They are relatively easy to use and a great aid in the drawing process. There is some type of prism system mounted inside the tube that enables one to see the insect being drawn and the pencil and paper at the same time. The drawing paper is placed below the end of the tube, which is a mirror. I use printer paper for the preliminary drawings and draw with an HB drawing pencil. Lighting is critical when using the drawing tube and it is helpful, if not necessary, to have a light source to the right of the drawing surface (for left handed people the drawing tube can be turned around to the other side of the microscope and in that case the light would be on the left). Additionally, it is easier to see your pencil when drawing if the light on the specimen is minimal. A balance has to be found where there is enough light to see the specimen and yet, not so much light that the pencil can't be seen. Most drawing tubes have a focusing knob of some type or another that focuses the drawing area. After everything is ready, lighting, focus, etc., the drawing can be started. It is best to draw only what is seen in the middle two thirds of the viewing area, because there is some distortion as the edge of the viewing area is reached. For habitus drawings, I usually draw the insect in several pieces at fairly high magnification. For example, if drawing a beetle, I may draw the legs, the antenna, the elytra, the pronotum and the head individually (See picture below). | |
 |
 |
Preliminary sketch of elytra of Prometopia sexmaculata. |
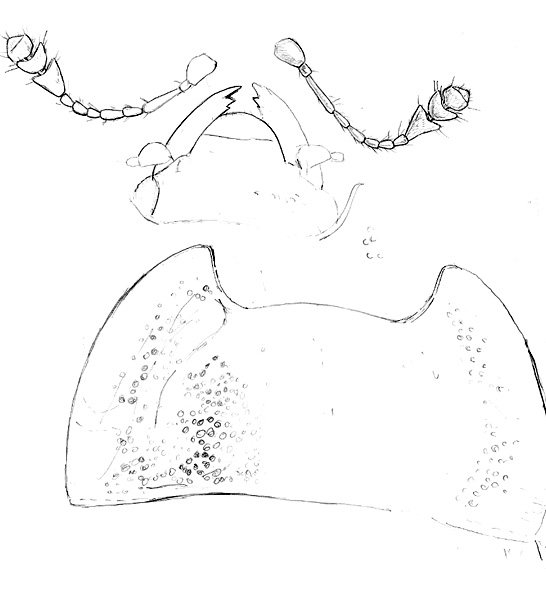
Preliminary sketch of head, antennae, and pronotum of Prometopia sexmaculata. |
 |
|
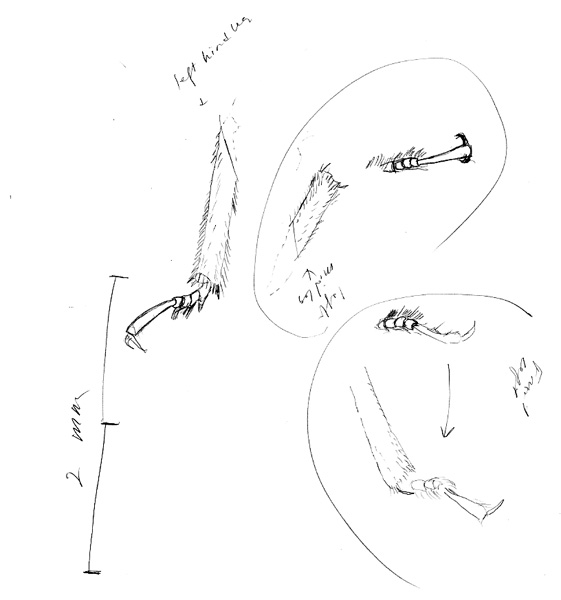
Preliminary sketch of legs of Prometopia sexmaculata. |
|
| I usually only draw one of each of the legs and antennae from one side of the body. Later, the legs and antenna can be traced upside down and and drawn on the other side of the beetle. Sometimes, I draw only half of the beetle and flip it over later and trace the other half so that the drawing is symmetrical, although I prefer not to do that. Preliminary drawings are not overly detailed, but are meant to get the proportions and other features down in an accurate manner. Scale lines are drawn by placing a ruler under the scope at the same magnification as the drawings are done at. It is sometimes necessary to draw certain features at a higher magnification than the main body parts. In this case, I reduce them on a photocopier until the scale lines match. In any event, I reduce all preliminary drawings on a photocopy machine to a more manageable size and darken them as well. After photocopies are made, I make a composite sketch on cheap paper (photocopy paper) by tracing the various images on a light table (see picture of composite image below). | |
 |
|
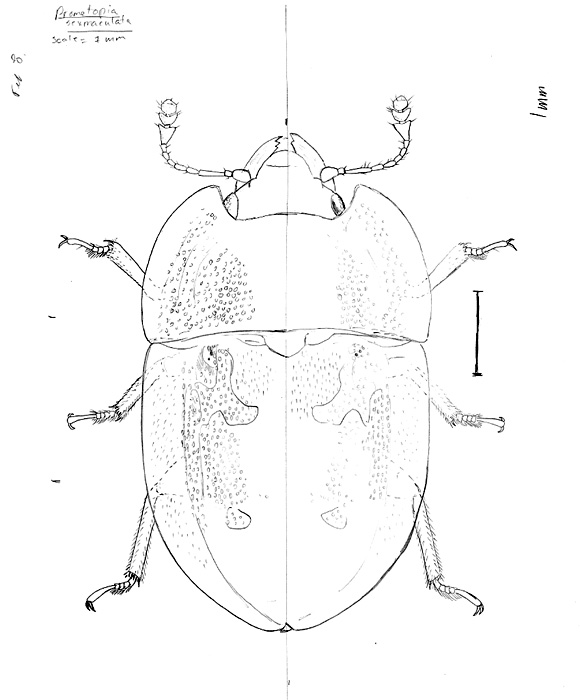
Composite sketch of Prometopia sexmaculata. |
|
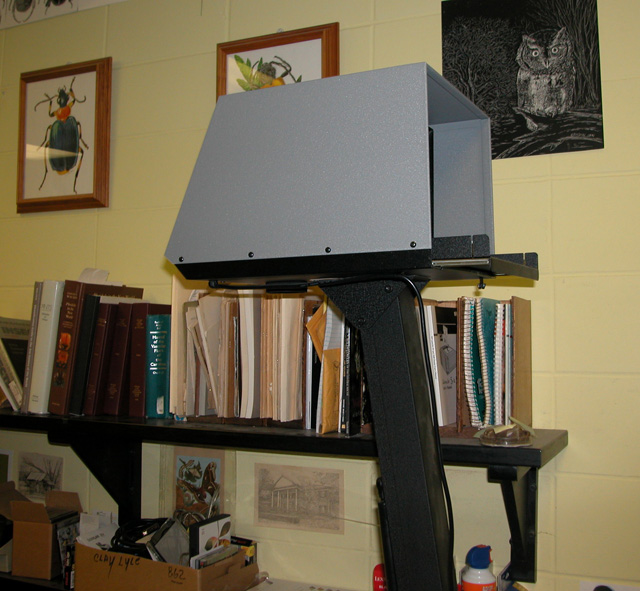
After the composite sketch is finished, I next transfer the drawing to the scratchboard. There are a couple of methods for doing this, one of which is by rubbing graphite on the back of the image and then tracing over the image with a sharp pencil while positioned on the scratch board. However, I use an opaque projector (see photo below) to transfer the image. I place the sketch in the projector, turn off the room lights, and project the image onto the scratchboard using a 2H pencil. |
|
 |
|
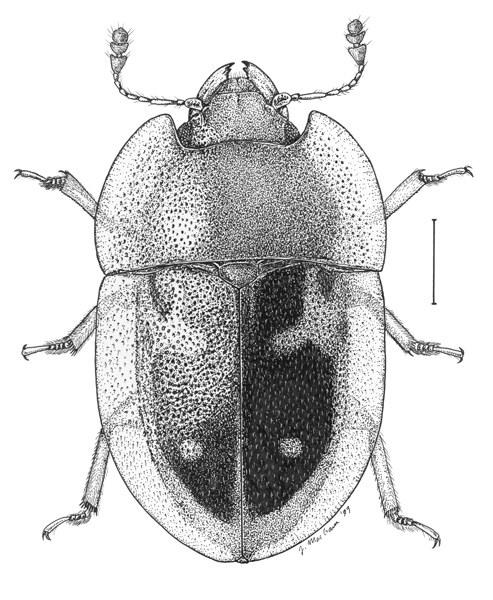
When the image has been transferred to the scratchboard, I then start the final ink drawing. This done by carefully comparing the specimen under the microscope to the drawing, going back and forth filling in the small details. I prefer to have the light on the specimen coming from the left side of the body so I can show both setation (on the right side of body) and punctures (on the left side of body). Outlines are done with a larger pen nib, such as 0.35 (or larger) and hairs and other small structures are done with smaller pen, such as 0.25, a crowquill pen, or a flexible, but non refillable pigment liner pen made by Staedtler. Stippled areas are done with a 0.25 to a 0.13 sized pen and large areas of dark are done with much thicker tipped pens or with a brush. Punctures, setae, or other structures that need to be scratched out are done with a scratching tool sold for that purpose or with a small exacto knife, which I generally use. After the drawing is completed, the scale line is inked in using a thicker pen (such as a 0.8) and a square to ensure straightness. The final drawing usually takes between a day or two depending on the complexity (see final drawing below). |
|
 |
|
Final drawing of Prometopia sexmaculata (Nitidulidae). |
|
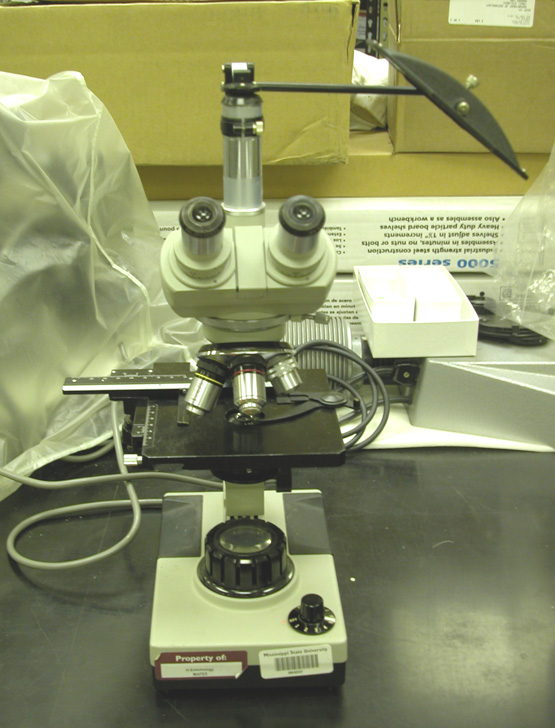
| Drawings of structures, such as genitalia, legs, wings, etc. can also be done with a drawing tube. If the structures are very small, higher magnification is needed and therefore a drawing tube mounted on a compound microscope may be needed. Alternatively, a camera lucida can be used on a compound scope. A camera lucida is similar to a drawing tube, but fits on an ocular rather than under the oculars in the body of the microscope. Consequently, drawings are much larger in size and will have to be reduced considerably. Another advantage of the camera lucida is that they will fit on a variety of microscopes. Unfortunately, the camera lucida tends to be more tricky to use for the average person (see picture of camera lucida on compound scope below). As with the drawing tube, there is some distortion at the edges of view and it is best to draw in the center two thirds of the image. Additionally, when using the camera lucida for the first time, it has to be calibrated by moving the mirror to the proper angle so the image being drawn is not distorted. The easiest way to do this is by putting a gridded micrometer under the scope and drawing it, then measuring the sides to see if they are equal. If not, then move the mirror accordingly until the sides are equal. | |
 |
|
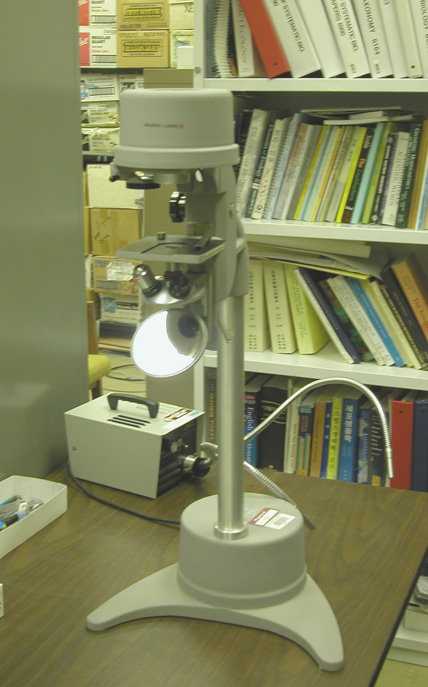
| For slide mounted mounted, another alternative exists for drawing various structures, the micro-slide projector (see picture below). Simply place the slide in the clips, select the appropriate magnification, focus the specimen, turn the lights off and project the image onto a piece of paper. The image can either be projected straight down or, with the use of the attached mirror, it can be projected toward a wall. To enlarge or reduce the image, the projector must be placed higher or lower, for images directed downward, or closer or farther from a wall, for images projected horizontally. This is a useful method for such structures as genitalia, but final details will still need to be added later while looking under a compound scope. | |
 |
|
Another method for drawing insects is by using a gridded micrometer, which fits inside an ocular lens. The drawing is done on gridded paper by relating where lines fall between the grids on the image to the gridded paper. This method is not as accurate as the drawing tube, but if one is not available it works satisfactorily. Yet one more method for drawing insects is tracing a good photograph, if available. This is especially useful for larger insects. Details can be drawn in later by comparing a pinned specimen under the scope to the drawing. For more information on scientific illustration in general, a wonderful book edited by Elaine Hodges is available entitled: The Guild Book of Scientific Illustration. This book can be purchased at Amazon.com, although it is relatively expensive. |
|


MEM | Info & Services | Museum Personnel | Research Taxa | MEM/SCAN Database | Moth Photographer's Group | MS Bug Blues | Screening Center | Cross Expeditions |
Publications/Archives| Anthropological Entomology | Education | Mississippi Habitats | Visitors
Copyright 2006, all rights reserved, Mississippi Entomological Museum, Mississippi State University
For comments and feedback concerning this site contact Joe MacGown at jmacgown@entomology.msstate.edu
Last updated on January 21, 2022
"The views and opinions expressed herein are strictly those of the page author or organization.
The contents of this page have not been reviewed or approved by Mississippi State University."